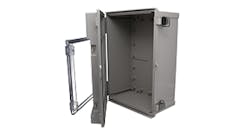
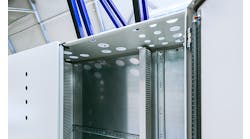
Like other installations, wireless equipment requires protection from the elements and, in some cases, industrial hazardous area classifications. The most common way of providing this protection is to install the necessary equipment (radio, I/O cards and backplane, power supply) inside an appropriate enclosure or cabinet.
But since a metal enclosure (or a steel building) tends to behave as a Faraday cage, it’s not a viable option for wireless, unless an antenna takes the radio signal outside the cabinet or building. Fortunately, there are alternative enclosure materials such as plastic (widely used in Europe) or fiberglass, which provides better strength and temperature range (high and low) than plastic, but can be more susceptible to UV damage.
A typical installation I've designed and installed includes multiple remote stations reporting wirelessly to a central station that connects to the backhaul/balance of the control network. I aim to place the central station near a “hard” network backbone—a Wi-Fi network or an other higher bandwidth connection—and in direct line-of-sight of other nodes.
Don't forget that line of sight is in three dimensions, so try to obtain topographical maps or, at a minimum, satellite imagery (often available through your favorite map application) to check.
Now that we know where the signals are headed, let’s return to designing the radio enclosure itself. Regardless of where you live, if you’re outdoors, then you’ll likely need to consider temperature control (heating, cooling or both). Often, it's the support systems that most need temperature control, and in my case, it's to prevent freezing the uninterruptible power supply (UPS) needed to handle short-term power interruptions, as well as the sensor needed to measure power quality in real-time.
If you are adding heating (or cooling), you may also want to consider insulation, but remember every layer means additional signal attenuation for a radio mounted inside the cabinet. (Remember, too, that installing foil-backed insulation in a plastic or fiberglass enclosure defeats the purpose, folks.) From a practical perspective, I normally select insulation that's slightly thinner than the lip or rim of the enclosure or backplane standoffs, so I still have most of the open cabinet space to work with.
If you add an antenna, you get the benefit of its gain ratio, but also need to consider the losses associated with each connection between the radio and the antenna. These normally include the cable from the radio to the gland, gland through the wall, and gland to antenna—a minimum of three connections. Also, don't coil any of the cables associated with the antenna. If you do, be sure to follow manufacturer’s directions on minimum radius so your coil doesn't become an antenna itself. An additional consideration is to be sure you have a loop or similar for the ice and water to run off the bottom of the cable, rather than into the enclosure. Although it seems counterintuitive, if you're using a cabled antenna rather than a stub (normally with gland mounted on top), run the cable from the bottom of the enclosure.
A few more tips when laying out cabinets:
- Remember to leave room around all components for installation and maintenance. This means for fingers and thumbs at a minimum.
- Field wiring on one side, control wiring on the other.
- AC well spaced from DC, and if they need to cross, keep them at right angles.
- Remember heat rises, so put heat-generating items toward the top of the enclosure (in cold climes) or near the bottom (in hot climes).
- Space helps not only with maintenance but also with air flow. Though less of an issue with newer devices, always check if the unit needs to be installed vertically (normal situation) or if horizontal is okay should you need to do so.
Cabinet and enclosure design requires many considerations, and when it involves a radio, several new items are added to the list. Any additional suggestions from your own bag of tricks to share?


