I happened upon one of Scott Adam’s “Dilbert” comics where his pointy-haired boss asks, “Are you sure the data you gave me is correct?” Dilbert’s reply: “I’ve been giving you incorrect data for years. This is the first time you’ve asked.” As someone whose core mission includes delivering meaningful measurements, I can relate. What’s my answer if my boss asks the same question?
If you’d like the best possible accuracy from your temperature sensor, you might think in terms of sensor technology. It’s generally accepted that a platinum resistance temperature detector (RTD) will achieve better accuracy and stability than a thermocouple, where two dissimilar metals are joined and produce a millivolt signal in proportion to the difference in temperature between the two junctions. Out of the box, a standard 100-ohm platinum RTD will have better than 1 degree accuracy below 100° C, with increasing uncertainty as the measured temperature increases. Some vendors offer RTDs for specific ranges or maximum temperatures. If your process is running at 751° F/400° C, the path to temperature “certainty” most likely requires a test at the operating point.
Whether you have an in-house calibration capability or rely on your supplier, a temperature “bath”—an apparatus for applying a known temperature to the sensor of interest—is often used. The temperature of the bath is typically measured by a National Institute of Standards and Technology (NIST)-certified or NIST-traceable temperature sensor. For a fee of a few hundred dollars to maybe around $20,000, NIST will characterize a given sensor against other certified sensors or “triple points” (melting points) of various fluids. Most people probably know that the triple point of water is around 0° C (at specific pressure conditions). NIST uses the melting points of various other substances from near absolute zero to more than 1 000° C to “standardize the standards.” In addition, there are international committees convened to agree on the appointed temperatures used for standardization.
Once compared to the NIST-traceable sensor in one’s temperature bath, you might find yours is deviating at some points of interest. While RTDs are inherently more accurate and linear than thermocouples, they’re not perfectly linear, and each sensor deviates from the established tables to some degree.
A century ago, British physicist Hugh Longbourne Callendar labored to elevate the RTD as an accurate temperature sensor, and his equation relating resistance to temperature was later refined by NIST chemist M.S. Van Dusen. For a specific sensor, your temperature transmitter might have the capability to include the Callendar-Van Dusen coefficients, which provide a characterization of temperature to that sensor’s resistance, improving accuracy versus standard tables and linearization.
If you’ve pursued certainty to this point, you might feel comfortable and be satisfied, but you’re not finished. Since you’ve established a relationship between resistance and temperatures, you must now measure that resistance at the tip of a probe that might be many feet away (some elements that are more than 50 ft. long). A change of 1° F changes a standard 100-ohm platinum RTD’s resistance less than 0.2 ohms at 750° F. RTDs are commonly supplied in three- or four-wire varieties, permitting the transducer to subtract the resistance of the conductors and terminations between the sensor and the transmitter. Both lead wire and RTD must be measured with comparable accuracy.
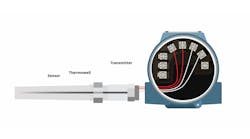
Interest in improved accuracy motivates some to locate a transmitter as close as possible to the sensor, even in the sensor “head.” While this is likely better than a kilometer of lead wire, the influence of ambient temperature on the transmitter might be worth a look. Unless the transmitter is digitally integrated using fieldbus, you’ll have uncertainty introduced through D/A (generating a 4-20 mA signal) and the corresponding A/D at the DCS or PLC I/O card.
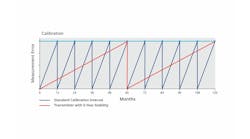
When operators or my boss ask me how sure I am that their reading is correct, I can reply it’s as good as the standard to which it was calibrated on the day it was calibrated. Who knows what other vagaries of measurement uncertainty might have crept in since then?
